continued from Part 1
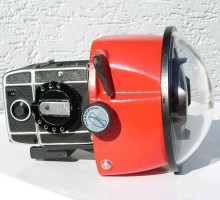
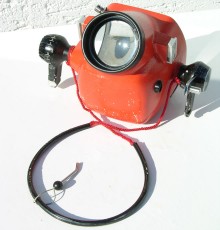
...Before putting the camera into the housing, it needs to be prepared first: the viewfinder hood on top of the “Rollei SL 66” must be removed, and a tooth-wheel ring is fixed onto the lens: this plastic ring fits perfectly and is responsible for the adjustment of the diaphragm. In addition to this, a second tooth-ring must be installed on the right hand side, on the wheel for shutter speed selection and another adapter is clipped on the distance wheel. With such effortless ease, the camera is prepared within a minute. Now, it can be pushed into the front part of the housing.
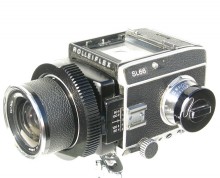
SL66 ready for placement in Aquamarin
This front part has a big plane front window, where the camera lens looks through and it is fitted with a base plate for the camera itself. Underneath it we have a little box with a battery and some electronic internals for the synchronisation of the flashlight. On the outside of the front part we can find controls for releasing the shutter and to adjust the diaphragm and speed settings. Then we put the camera in, up to its locating stop but we must also check that both of the tooth-rings fit exactly with the gear units in the housing. These mating parts allow proper control of all camera adjustments from the outside. The shutter release gear comes automatically into its correct position; then the camera gets screwed onto the base plate. At the end of this installation only the flash synchronisation cable needs to be plugged in.
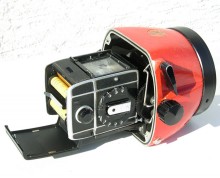
SL66 in front housing of Aquamarine
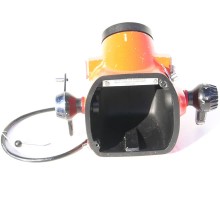
The rear part of the housing contains an optical prism, which later on allows the observation of the focussing screen at an angle of 30°, this means in the normal swimming position. On the outside, it is covered by a magnifying glass. This compartment also contains the control wheels for film transport and the distance adjustment. Both become automatically connected with the camera, just by putting together the rear and the front part: At that moment the appropriate appliances just slip into their working positions. Two guide pins on the front section locate in recesses in the rear section and a big O-ring, in a milled groove, seals both housing parts coming together. After this, two little eccentric levers must be fastened with a little pin. To make it impossible to loose this tool, it is fixed onto the strap of the housing.
SL 66 inserted into Aquamarine housing front lens
On the outside of the rear part, there are also adapters for fastening the flashlight. In the beginning, the housing was delivered with one “Rolleimarin” flash light device for using normal bulbs, which could be changed underwater, but two of them could be connected, one on each side. Later on I modified the housing with a watertight cable connector to also use an electronic flash.
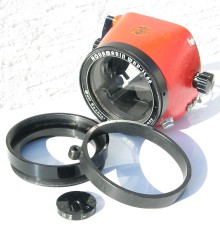
The description above, for installing the camera, is exactly the same regardless of whether a normal lens or a 50 mm wide-angle lens will be used. But in the case of the 150 mm lens being installed, a special extension ring must first be fitted in between the front part of the housing and the front glass window and also another focus adjusting ring with the appropriate distance markings must be exchanged on the housing. Both of these operations require together approximately half an hour...
SL 66 Aquamarine housing front lens
It is possible to use the 180° fish-eye lens too. All projections delivered by lenses are round ones, regardless of which camera or which projector will be used. But nobody would like such round pictures. Therefore a frame inside of the camera cuts off the round edges and makes the pictures square or rectangular; this means we always get just a cutout of the full projected picture. Well, the manufacturer normally cuts off bigger parts; so always the inner part of such a circle is shown, sharp in all its details and without dark corners… The same is of course true with the fish-eye-lens. The 180 degrees therefore is determined by the diameter of the view across the complete round picture. But you can use such a complete 180 degrees projection only if the lens is fully corrected and the image is absolutely sharp in the outer peripheral area. We do have for our SL 66, such a fantastic fish-eye-lens. Since the view is squared, you will see the full 180 degrees only in the diagonal, measured from one corner to the opposite one – e.g. from the lower left corner to the upper right one.
SL 66 Aquamarine front housing
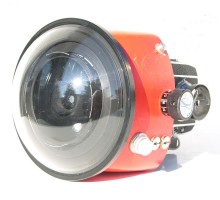
In the case of the 180° fish-eye lens being used, we would get totally round pictures with black corners because of vignetting from the lens port; so another special front section becomes necessary. In this case the construction is a bit shorter and it is provided with a plastic dome port made of acrylic glass. Due to the heavy weight of the fish-eye-lens, a special holding ring is installed inside the housing to support it. In all its other details, this compartment is more or less the same as the normal one described above, fitting as before to the original rear part.
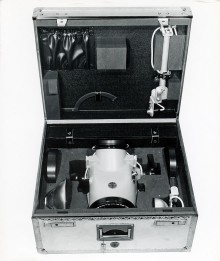
In fact, this housing offers not only some more possibilities to an underwater photographer than the “Rolleimarin” but the application of all photographic techniques which are also used on land! Its buoyancy is absolutely perfect: During use it is a little bit heavier than the surrounding water itself. So it does not float, but it is still light, and the handling is easy in all shooting positions. The construction is very ergonomic. All service elements are O-ring sealed and perfectly positioned. Handling is easy, even with gloves in cold water. Also a film change when back on board can be done without any complications: it is only necessary to dry up the water drops on the outside and the housing can be opened. The splitting of the two compartments is such that the camera never needs to be removed.
SL 66 Aquamarine internal rear housing
But on the other hand, the housing must be handled with much more care than the “Rolleimarin”: It is a really huge one, and therefore it is more sensitive to damages in the dry environment: e.g. the gasket seating areas are not protected by any special shaping. They therefore could be easily damaged during a film change in a boat during heavy seas and due to the relatively big diameter, the reinforcement of the big openings is not strong enough: The whole housing easily could become squeezed during transport, which could lead to an unwanted leak. To avoid this, transportation always should be done in its special transportation suitcase and to protect the dome port, a special hard hood should be put over it. Little scratches on the outside of the dome port do not affect the pictures, because acrylic glass and water have more or less the same refractive index. But it is possible to face another problem with the dome-port: since the dome-port is not fixed by any retaining ring, it is very sensitive to any overpressure inside the housing: Just a drive from home in the mid-lands to a high-altitude inland lake could cause the dome port to blow-off. This is not a real problem but a surprise anyhow and it is good to know about such possibilities. In such a case, it is easy to install the dome-port again: to protect its surface, just put a handkerchief on top of it and then press it in again. Therefore, this dome-port-compartment never should be installed prior to any journey.
SL 66 Aquamarine external rear housing
To know such weaknesses makes it possible to enjoy this housing for many, many years. Well, in the meantime the “Aquamarin” and also the “Rollei SL66” no longer represent modern camera technology but this housing is still a rare object for serious camera collectors, and I for myself, sometimes still use this equipment for special tasks…