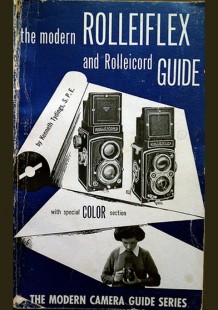
Having not long ago come across and reviewed in these pages Jacob Deschin’s ‘Rollei Photography’, I was interested recently to find in a shop a copy of another American Rollei book of similar vintage. Kenneth Tyding’s book was published in 1952 in New York and forms part of a series known as ‘Modern Camera Guides’. The format is rather similar to the Focal Press camera guides but it has to be said that from the viewpoint of the present day user the book is much less informative. For a start, it largely ignores the considerable number of cameras that had been produced in preceding years and concentrates on the then-current Rolleiflex Automat Model 4 and the Rolleicord III.
Additionally, a considerable part of the book is given over to general photographic advice, which would apply equally well to any make or type of camera. So I think for practical purposes the book must be regarded mainly as an interesting collectable, and one not very often to be seen in Britain. That said, there are a couple of tips offered which I have not seen suggested before and it would be good to have any views from fellow members about their practicality:

Photo 1 – No Rolleipar Photo 2 – Rolleipar with red dot at a quarter to Photo 3 – Rolleipar with red dot at a quarter past Photo 4 – Rolleipar with red dot at the top
1. Rolleipars
“An interesting use for the Rolleipar, not in connection with close-up parallax control, is for the purpose of its acting as a rising or falling front, as well as being used for side swings. If you try to take a picture of a tall building so that the entire building is on your film, the difficult angle requires that your camera be tilted upwards. The tilt generally causes some distortion. In addition, the square shape of the Rollei may show an excess amount of foreground. If you take either your Rolleipar 1 (Rolleinars are not used) or your Rolleipar 2 and use it with the indicating red dot or arrow down, first over your top lens for focusing, then lower it to your taking lens (tripod recommended) an interesting effect will occur as the whole building can be viewed even though your camera is parallel with and not tilted towards the building. You can take most buildings without having to tilt your camera and the amount of your foreground is diminished to decidedly better proportions. The only operational requirement is to stop your lens down to f/8 or f/11 to compensate for any possible distortions that may be caused by the prism effect.”
2. Bright Chrome Lens Cap
Apart from its obvious use “...it is an interesting attachment that can be used for portrait assignments. One method is to hold it up and have your subject look at his reflection in the mirror. By doing this, his attention is directed at a height that is correct for good eye modeling and facial expression. If it is inserted in the top lens only, you can release the delayed action mechanism, hurry to your seat, look at yourself in the reflector to arrange your head at a suitable angle, relax for better facial expression, and set your body for better composition and a better picture.” It had certainly never occurred to me previously that these accessories could be used in this way. In the case of the lens cap for self-portraiture, the thought occurs that a better option might be to use a very long cable release (or better still, a Rolleimot! JW), because the self-timer does not give you very long to get settled in the manner suggested!